Wednesday, May 16, 2012

Exhaust system

Time to have an exhaust system fabricated.  I decided to keep the single outlet at the rear and had a y-pipe along with a Magnaflow muffler installed.  A local custom shop did the work and it turned out great.  I'll let the pictures tell the story:


Ground clearance:


New shoes

Some new wheels to fit the big brake upgrade.They are 15"x8" 949 Racing 6UL wheels with 225/45 Hankook tires. About the biggest I could fit without doing any modifications to the body.


Sunday, November 20, 2011

Big Brakes

So with more than doubling the power with the V8, its time to upgrade the brakes too.
I went with a four wheel big brake kit from Flyin' Miata. It uses new larger front rotors and four piston calipers from Wilwood and new larger rear rotors from PowerSlot. Also new braided brake hoses, mounting hardware, pads, and a rear brake bias valve are included in the kit.

Kit:


New front versus old. Just a little larger...


Rear caliper relocation bracket installed for the larger rotor.


New rear rotor and stock caliper installed.


Front rotor assembled with safety wire.


Front rotor and caliper assembly installed.


Now with the bigger brakes the stock wheels will no longer fit. I will remedy this problem next...

Saturday, September 3, 2011

Unplanned surprise...oh and it runs!


Well I didn't plan on this. I tried to purge the fuel lines prior to an engine start attempt and we were getting no fuel from the pump. Pump was making sounds but doing nothing. I removed the sending unit/fuel pump assembly only to find this surprise:
A nice rust filled fuel tank...


and corroded pump assembly.


So now I need a new fuel tank. I don't plan on sending all of that rust and corrosion into the engine and fuel lines! Moisture must have gotten into the tank and taken over. This is humid Florida after all.

So a couple of weeks later I got the new tank from the local dealer.
Nice and shiny inside, quite a difference.


Out with the old tank..


A view from under the car where the tank used to be:
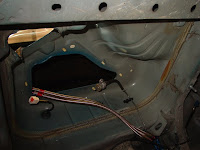

I decided to redo the fittings on the sender for the fuel lines. I was never too satisfied with the original setup. Decided to use a set of Russell EFI screw on fittings on the existing Mazda connections. To do this I had to cut off the flares and file down the lines just slightly to fit.
Some pics:


New pump and sending unit assembly ready:


And installed:


After all of that we were able to purge the fuel lines and test for any leaks. Of course there were a couple that were fixed. We then got ready to start the engine. Fluids were added and fingers were crossed. Connected the ECU and turned the key....nothing. What? Oh yeah, I forgot the clutch safety switch. Oops. Pushed in the clutch and she fired right up! Woo-hoo!
It was so rewarding to hear that engine rumble, open headers and all.

Now its time to start reassembly. Interior, suspension front and rear, and lots of small stuff. Hopefully its all down hill from here!

Thursday, July 28, 2011

Front sway bar mount


There is not much room in front of the V8 in the engine bay once the accessories and radiator have been installed. The factory mounting location for the front sway bar places it right into the crankshaft pulley on the engine. It has to be moved forward or find a custom sway bar that would clear. I chose to move the bar forward. Using a set of reinforced mounts from FlyinMiata, I moved the mounts forward enough for the bar to clear the engine accessories. The mounts were then welded and bolted into place.

Driver side mount in position:


Mount installed (I know, ugly welds but it works)

Remote oil filter

Next up was finding a home for the remote oil filter. Decided on placing it in front of the radiator behind the front bumper. As long as I don't hit anything really hard it should be ok. (If I hit something hard enough to damage the mount/lines, I think an oil leak would be the least of my worries!)

Some pics (note you can also see the power steering cooler also in the head on picture):


Headers...uh oh


Something is wrong here...can you see it? Yep the "custom fit" headers hit the steering column. After speaking with the header builder it was decided the best solution would be to dimple the header since they would need the car to design a new header. They are not local so I couldn't supply the car. I was worried about damaging the ceramic coating but was told it should hold up and after heating with a torch and a few hits with a hammer & impact socket, it seems to have done the trick. We shall see.