Sunday, February 15, 2015

New roof

Time for a new convertible top.
As you can see, the original has had better days.


I removed the top and frame assembly from the car to simplify things.


With the assembly out of the car it was just a simple matter of removing the old top from the frame and then installing the new one. I didn't take any pictures of this but trust me it was the easy part.


Installed into the car.

This was the difficult part.  Stretching the new top to the mounting points was not easy.  I recommend having a second pair of hands to help.  It wasn't terrible but now I see why the shops get the labor fees they charge! 

Letting the heat out

To try and let some of the engine heat out I decided to create some hood vents.

Placement of the hood openings was determined at a low air pressure area of the hood.  The idea is to draw heat out while the car is in motion.  This will also allow more air to flow through the engine compartment.  So first I marked the openings with masking tape and then removed the hood.

Drilled each corner and carefully cut with a metal body saw.  I then finished the shape with a Dremel tool.


After cutting the hood, I installed a fine mesh aluminum screen.


Not perfect but it does the job.


It has made a difference.  Temperatures run about 3 to 5 degrees cooler now.


Wednesday, May 16, 2012

Engine tune

Since my engine setup is a custom one with a different camshaft, intake manifold, headers, and computer it needed a custom tune done for it to run well.  After having no luck finding a shop close by that did custom tuning on a late model GM V8, I found EFI Alchemy about an hour away.  So we rented a trailer and towed it up to them for a dyno tune and some road testing. Doc at EFI Alchemy worked his magic and it is running great now.  Great service, I'd recommend them to anyone!

Dyno numbers were 310rwhp and 305 rwtq. So with drivetrain losses that should be about 340-350hp at the flywheel.  Initial impressions: pulls strong!


Quick video of dyno pull:


Exhaust system

Time to have an exhaust system fabricated.  I decided to keep the single outlet at the rear and had a y-pipe along with a Magnaflow muffler installed.  A local custom shop did the work and it turned out great.  I'll let the pictures tell the story:


Ground clearance:


New shoes

Some new wheels to fit the big brake upgrade.They are 15"x8" 949 Racing 6UL wheels with 225/45 Hankook tires. About the biggest I could fit without doing any modifications to the body.


Sunday, November 20, 2011

Big Brakes

So with more than doubling the power with the V8, its time to upgrade the brakes too.
I went with a four wheel big brake kit from Flyin' Miata. It uses new larger front rotors and four piston calipers from Wilwood and new larger rear rotors from PowerSlot. Also new braided brake hoses, mounting hardware, pads, and a rear brake bias valve are included in the kit.

Kit:


New front versus old. Just a little larger...


Rear caliper relocation bracket installed for the larger rotor.


New rear rotor and stock caliper installed.


Front rotor assembled with safety wire.


Front rotor and caliper assembly installed.


Now with the bigger brakes the stock wheels will no longer fit. I will remedy this problem next...

Saturday, September 3, 2011

Unplanned surprise...oh and it runs!


Well I didn't plan on this. I tried to purge the fuel lines prior to an engine start attempt and we were getting no fuel from the pump. Pump was making sounds but doing nothing. I removed the sending unit/fuel pump assembly only to find this surprise:
A nice rust filled fuel tank...


and corroded pump assembly.


So now I need a new fuel tank. I don't plan on sending all of that rust and corrosion into the engine and fuel lines! Moisture must have gotten into the tank and taken over. This is humid Florida after all.

So a couple of weeks later I got the new tank from the local dealer.
Nice and shiny inside, quite a difference.


Out with the old tank..


A view from under the car where the tank used to be:


I decided to redo the fittings on the sender for the fuel lines. I was never too satisfied with the original setup. Decided to use a set of Russell EFI screw on fittings on the existing Mazda connections. To do this I had to cut off the flares and file down the lines just slightly to fit.
Some pics:


New pump and sending unit assembly ready:


And installed:


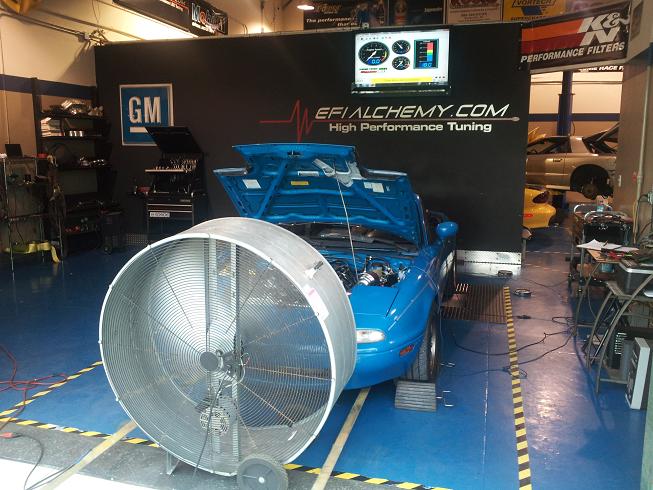
After all of that we were able to purge the fuel lines and test for any leaks. Of course there were a couple that were fixed. We then got ready to start the engine. Fluids were added and fingers were crossed. Connected the ECU and turned the key....nothing. What? Oh yeah, I forgot the clutch safety switch. Oops. Pushed in the clutch and she fired right up! Woo-hoo!
It was so rewarding to hear that engine rumble, open headers and all.

Now its time to start reassembly. Interior, suspension front and rear, and lots of small stuff. Hopefully its all down hill from here!